Trying something different. The boys have track meets twice a week and practice the other three. We are running- literally and figuratively! Here is our meal plan for the week. You can click the name of the recipe, which links you to the website where I got the recipe or the cookbook is listed where you can find the recipe.
This chili got put on the menu because the boys got tired of me trying new recipes! I go through jags of working through a new cookbook or magazine and that happened last week. When I do my share of the menu planning, I ask the boys if they have any requests. Neither had any ideas for me, so off I went. On Monday night, after seeing nothing familiar for the rest of the week, my older son put a sticky note on the monthly meal planner that he wanted this for dinner 😂 I remember when my mom gave me this recipe. It was right after my oldest
son was born. I still have the original copy she made from Family
Circle magazine. I made a few modifications for our tastes. This a recipe that can be thrown together on a weeknight or made over the weekend and warmed up and served later during the week. This recipe freezes well. I serve this with cheese on top.
Shannon's Sweet Chili 1 pound ground beef 1 large onion, diced
1 can diced tomatoes, 28 ounces 1 can tomato sauce, 28 ounces 2 cans dark red kidney beans, rinsed and drained 1/3 cup packed light brown sugar
In a large nonstick pot, brown beef, onion and garlic for about 10 minutes, stirring occasionally.
Add chili powder, salt, cumin, pepper and oregano.
Cook for 2 minutes until fragrant. Add diced tomatoes. Fill can with water
and add to pot along with tomato sauce, beans and brown sugar. Bring to a
boil. Lower heat and simmer, uncovered, for 30 to 35 minutes.
Let stand for 10 minutes
Serve over cooked elbow macaroni. Serve with cheese and sour cream if desired. Makes 8 servings.
This is one of those dishes I've had my whole life. My mom got it off of the Mueller's Elbow Macaroni box. It is a family classic. I remember she made us Macaroni and Cheese a lot when she and my dad went out to dinner and we would have a sitter. Then even when we were old enough to not need a sitter. Just like my mother, I make this when we go out for dinner. It is so easy to make and pop in the oven.
When my brother was dating his now wife, in college, he made this for her. She loved it so much that she made it for her roommates for dinner. They loved it so much that one of them made it for dinner EVERY week!
I don't recall my mom using a certain brand of cheese. Most likely whatever she had a coupon for. She used coupons before using coupons became a "thing". I, on the other-hand, prefer to use Sargento 4 State Cheddar. It is a blend of Mild and Sharp Cheddar Cheeses that really makes this recipe. (No, this is NOT a sponsored post, I just love this cheese!)
The leftovers are also tasty. The boys will happily eat them. The key
when reheating is adding a little bit of milk to help give it some sauce
and adding more cheese. Stir, reheat, stir and serve.
Baked Macaroni and Cheese 2 Tablespoons Corn Starch 1 teaspoon salt 1/2 teaspoon dry mustard 1/4 teaspoon pepper 2 1/2 cups milk 2 Tablespoons butter 2 cups shredded cheddar cheese 8 ounces elbows (~1 3/4 cups) Cook elbows for about 7 minutes and drain.
In medium saucepan combine first 4 ingredients; stir in milk. Add butter, stirring constantly, bring to a boil over medium-high heat and boil 1 minute. Remove from heat. Stir in cheese until melted. Add elbows. Pour into greased 2-quart casserole. Bake uncovered in 375º oven for 25 minutes or until lightly browned. Let sit 5-10 minutes before serving.
So, I seem to be on a side dish kick lately. Well, it is a pretty important to have some go-tos when you cook dinner pretty much every night of the week. One can only have steamed veggies so many times. These are on rotation quite a bit. I even make them for us to eat with lunch on the weekends because they are just that good! These are similar to Roasted Broccoli, but I love them so much they get their own post 😀 I have only ever made these using FROZEN green beans, straight from the freezer. The most they get thawed is if I get them on the pan and the oven is not to temperature.
I make a large batch of these and if there are any leftovers, it is a small container. This recipe could easily be halved.
Roasted Green Beans 20-24 ounces green beans 2 Tablespoons vegetable oil 1 teaspoon kosher salt Black pepper to taste Preheat oven to 450º Place green beans in a 9x13 baking pan. Drizzle with the oil and toss to coat. Add salt and pepper, toss to coat. Bake 25-30 minutes until tender and browned in spots.
If you are like me, you get tired of making the same side dishes all the time. I was so happy when I stumbled upon this recipe. The boys and I love them, which is key. The wedges are not small, but they really do bake up crispy and delicious. To cut the potatoes into wedges, cut each potato lengthwise in half. Turn potatoes cut side down, and cut each half lengthwise into 4 wedges. I leave the skin on for extra deliciousness.
These potatoes are also easy to throw together. I can usually have these in the oven in less time than it takes for the oven to heat up. They cook for about 30 minutes, so there is plenty of time to get your main dish and a veggie done without too much work. Don't be shocked, but we like these with ketchup!
Potato Wedges 3/4 teaspoon salt 1/2 teaspoon sugar 1/2 teaspoon paprika 1/4 teaspoon ground mustard 1/4 teaspoon garlic powder 2 1/4 pounds baking potatoes, 3-4 medium Olive Oil Heat oven to 425º. Mix salt, sugar, paprika, mustard and garlic powder. Scrub potatoes, leaving skin on. Cut the potatoes into wedges, cut each potato lengthwise in half. Turn
potatoes cut side down, and cut each half lengthwise into 4 wedges. Place potatoes in a jelly-roll pan.
Generously pour olive oil over potatoes. I use between 2-4 Tablespoons. Mix potatoes and olive oil so potatoes are evenly coated. Sprinkle spice mix onto potatoes, mix again. Bake 25-30 minutes, turning the potato wedges halfway through.
If you haven't baked your bacon in the oven you need to try this! This isn't a recipe per say, but you can cook an entire package of bacon at once, that turns out pretty much perfect every time with little effort.
The trick to making your bacon in the oven is putting the bacon in a cold oven. As the oven heats up, it slowly renders the fat.
You end up with crispy, meaty pieces.
Oven Baked Bacon Line a half-sheet pan with parchment paper. Lay bacon on pan, try not to have it overlap. Place pan in COLD oven. Set oven temperature to 400º. Set timer for 20 minutes. Remove pan from oven. Drain bacon grease and turn bacon pieces. Bake for 5-10 minutes longer, depending on how crispy you like your bacon. Check the bacon frequently so it does not get overdone.
When you buy two bunches of bananas each week at the grocery store, there are usually a few leftover. Even after you use this handy trick: Buy one bunch of bananas as green as possible and stick them in a Green Bag, and clip it closed.
These muffins are SO easy to make - dump and process! It takes longer for the oven to heat up than to get these mixed up. I call these 5 ingredients, because to me, everyone should have baking soda, salt and cinnamon in their panty 😉They are also gluten-free. I use the food processor bowl from myNinja Blender system, which has a very high powered motor. I put everything in the bowl, process for 90 seconds, scrape down the sides, add the chocolate chips, and process for a minute more. (The chocolate chips stay mostly intact but end up larger than had I used mini chips.) After the second process you should not be able to see pieces of the dates. You can also use a blender, but you may need to blend the mixture a little longer. I get 12 nicely domed muffins from each batch.
There is no added sugar, other than what is in the chocolate chips, so make sure your bananas are VERY ripe. As my mom would say, loaded with sugar spots. Don't worry, the dates provide the sugar!
Older's Thoughts:
This recipe is fast and easy to make. They are tasty and I like to have them with butter. This is a kid friendly recipe; just dump in the ingredients, blend, then spoon into the muffin tins and bake. I like this recipe a lot! You could also put in berries and other kinds of chocolate chips.
5 Ingredient Banana Oat Muffins 2 cups rolled oats 3 medium bananas, very ripe 2 eggs ¾ cup pitted whole dates 1 teaspoon baking soda ⅛ teaspoon salt ⅛ teaspoon cinnamon ½ cup chocolate chips
Preheat oven to 350º
Mix all ingredients in a food processor until smooth.
Spoon batter into a greased muffin tin.
Bake for 15-20 minutes. Let rest in pan 5 minutes before removing from pan to a cooling rack to cool completely. Serve with a smear of butter or peanut butter.
Breakfast on weekends means pancakes or french toast. I try to do one or the other about once a month. This recipe makes a large batch, enough for two boys who will easily eat 6 or 8 (each!) and the two of us, plus a freezer bag full. It makes an easy breakfast for the boys during the school week and they taste so much better than store-bought frozen pancakes. You could halve the recipe if you don't want leftovers. These Fluffy Buttermilk Pancakes are by far our favorite. More often than not, I add chocolate chips, but we will on occasion, add blueberries. The nice thing about this recipe is it uses the whole quart of buttermilk. If it all possible, use real buttermilk, not soured milk or buttermilk powder.
I have three tricks for pancakes. One: Let the batter rest 5-10 minutes before dropping on a hot skillet. I think this helps with the fluffiness. Two: Use a cast iron skillet, because it maintains an even heat. I heat my pan to medium before dropping the batter. Three: Wait to drop the pancake batter until the butter has stopped bubbling.
Fluffy Buttermilk Pancakes 4 cups flour 4 teaspoons baking soda 1 teaspoon salt 4 Tablespoons sugar 4 eggs 4 cups buttermilk 6 tablespoons vegetable oil 1 teaspoon vanilla 1 cup chocolate chips (use standard size, not mini) or blueberries butter
Combine the flour, baking soda, salt and sugar in a large bowl.
Combine the eggs, buttermilk, oil and vanilla. Pour the liquid ingredients over the dry. Stir but do not beat. Lumps are okay.
Melt butter in a cast iron skillet over medium. Wait to drop pancake batter until butter has stopped bubbling.
Cook pancakes until bubbles that form on top, burst. Flip then cook the other side until golden brown.
It only seems like yesterday we were adjusting the spices in recipes so that they were more palatable for the boys to eat. Now, they tell us things aren't hot enough ( I think this has to do with age more than actual taste 😉). When I saw this recipe, I knew it would be a hit. What I didn't expect was for it to be as good as it was! We all thought this was just as good, if not better, than a casual dining restaurant. The flavors are all there, without the breading or greasiness. These tenders come together quickly, which is great for a weeknight meal. I did not have chicken tenders so cut up chicken breasts. I would not make that mistake again. The chicken breast strips started to fall apart a bit, so while the taste was there, it would have been better to have intact chicken tenders. I had help from Younger making these. He did the entire prep except for cutting up chicken breasts.
Today is a two-fer as I am also including a link to our FAVORITE Blue Cheese Dressing. The Blue Cheese dressing is a must when serving these tenders.
Younger's Thoughts: The sauce is excellent! You should just add a lot more sauce then recipe calls for.
Buffalo Chicken Tenders 1¼ pounds chicken tenders 2 Tablespoons all-purpose flour 1/4 teaspoon pepper 3 Tablespoons butter 5oz bottle Louisiana-style hot sauce, we used Franks 2½ teaspoons Worcestershire sauce 1/2 teaspoon dried oregano 1 teaspoon garlic powder Blue Cheese Dressing Mix the hot sauce, Worcestershire sauce, oregano, and garlic powder.
Toss chicken with flour and pepper (I do this in a plastic, zip-top bag). In a large skillet, heat 1 Tablespoon butter over medium heat. Add half the chicken; cook until no longer pink, 4-6 minutes per side. Remove from pan. Repeat with remaining chicken and 1 Tablespoon butter. In the same skillet, melt remaining butter; stir in hot sauce mixture. Add chicken; heat through, turning pieces to coat.
This is our absolute FAVORITE Blue Cheese Dressing. It is quick and easy to make. It is creamy and chunky.
I make this in a pint jarand shake to mix. I use these plastic lidswhen I make salad dressings. Blue Cheese Dressing 2½ ounces blue cheese 5 Tablespoons buttermilk 3 Tablespoons sour cream 2 Tablespoons mayonnaise 2 teaspoons white wine vinegar 1/4 teaspoon sugar 1/8 teaspoon garlic powder salt and pepper to taste In a pint jar, mash blue cheese and buttermilk together with a fork until mixture resembles large-curd cottage cheese. Add remaining ingredients, put lid on jar, shake until well blended. Season with salt and pepper to taste.
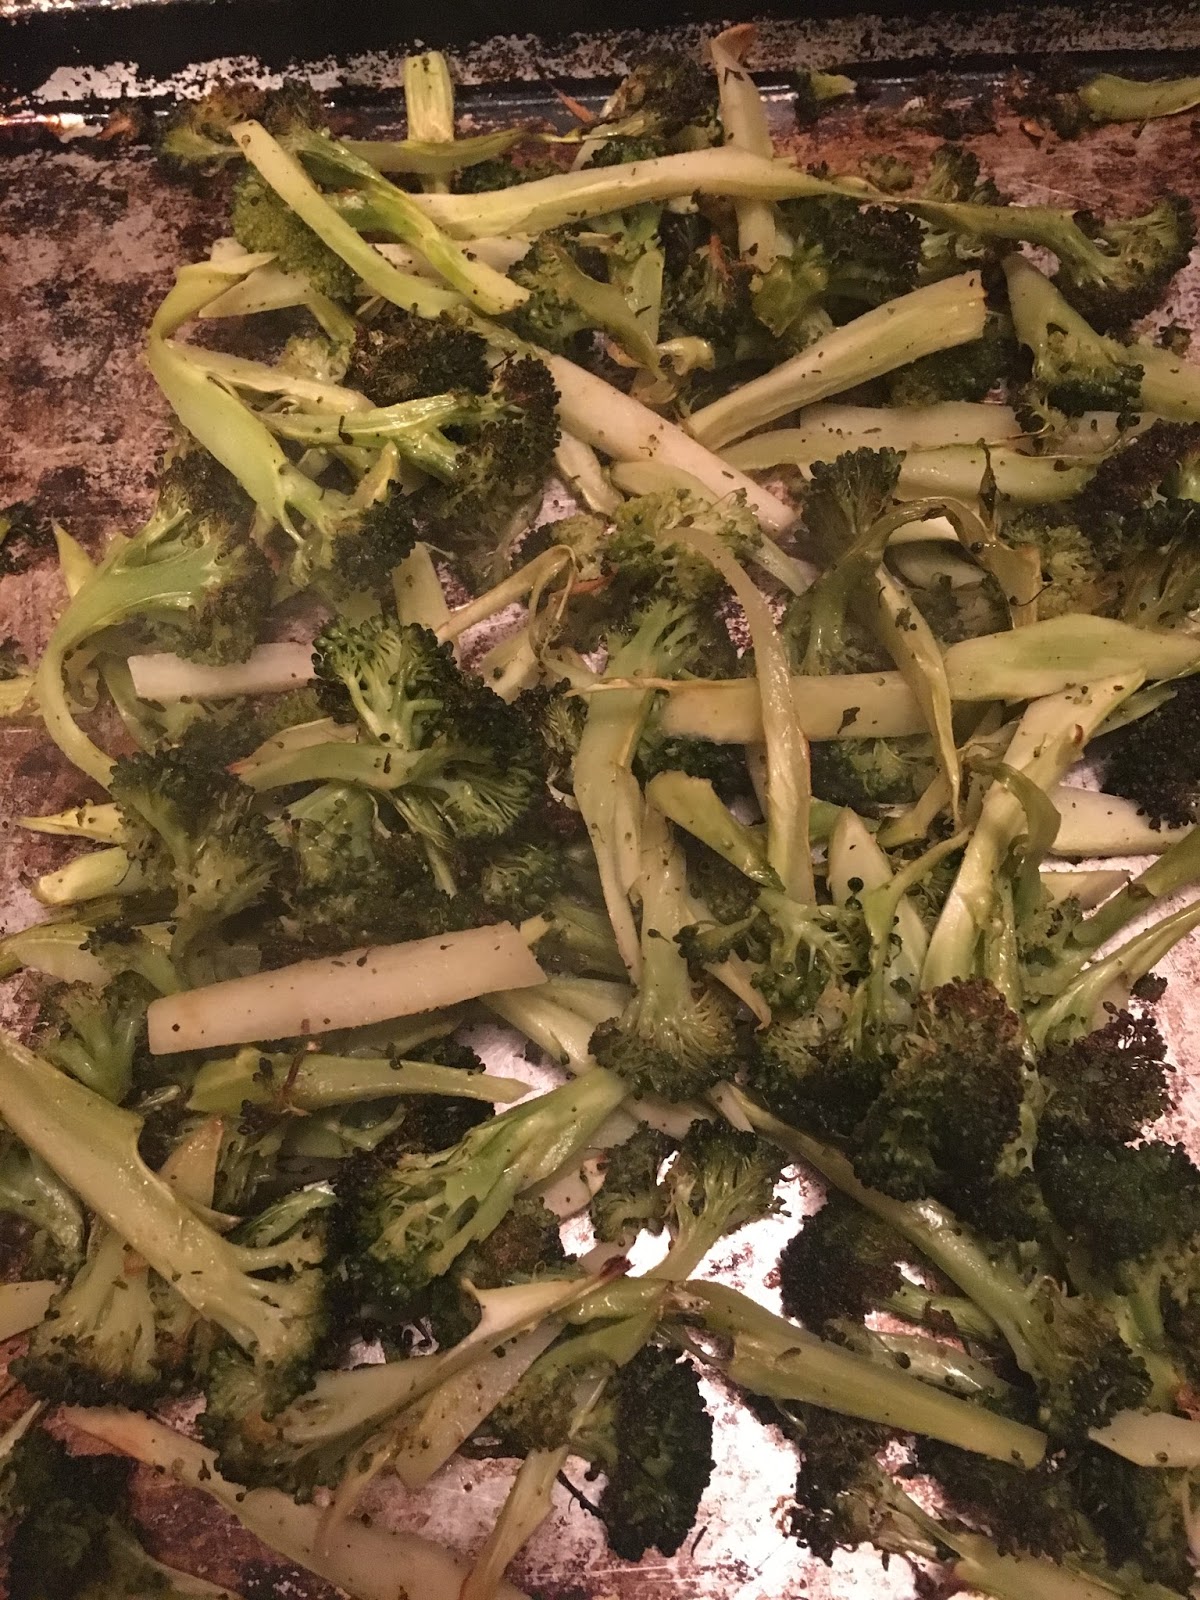
This has become one of our favorite vegetables to serve with dinner. Roasting in the oven caramelizes the broccoli, giving a slightly nutty flavor and brown color on the pieces touching the pan. It takes longer for the oven to heat up then to get it ready to put it in.
The Hubs chopped up the broccoli for this batch, so I used fresh. Usually I grab a couple of bags of florets out of the freezer, and it is SO good! I roast it on a jelly roll pan and the four us usually take care of the whole thing at one sitting. When I use frozen, I do not thaw before baking.
Oven Roasted Broccoli 1 large head of broccoli or 2- 10oz bags frozen florets 2 tablespoons olive oil Kosher Salt and Pepper to taste OR 1 teaspoon FishMama Spice
Preheat oven to 425º
Mix broccoli and olive oil on sheet pan. Sprinkle with seasoning. Bake 25-30 minutes.
I admit that I have a major sweet tooth. If it weren't for the Hubs checking and double checking most recipes I make, I would not even bat an eye about the sugar content in a recipe. I joke he is the healthiest person I know. Actually, it is not a joke, he is. I was thumbing though one of my favorite cookbooks, Run Fast Eat Slow, and spotted this recipe. The Hubs jokes that what I call quick breads are really cakes. It only has a 1/4 cup of sugar, so it quickly got put on the menu. The Younger said he would like to make this recipe, so off we went. We only had two ripe bananas on the counter, so we went to the freezer. I assume everyone has a bag of these, right?
I have found that peeling, and halving ripe bananas makes it easier for smoothies, whatnot. Today, it was banana bread. Younger put this bread together quick as a wink. I enjoyed that he did EVERYTHING by himself. Because this recipe has only 1/4 cup sugar, your bananas need to be very, very ripe. This bread is really quite nice. I know we will definitely be making it again because it is healthy and tastes good. You can tell it is made with whole grains and low sugar, in a good way. As I am writing this post, the loaf is pretty much devoured. Hubs and I liked it best when it had a light smear of butter. We did not use the optional walnuts as we have a tree nut allergy in the house, but they would be a delicious addition. Next time I will make sure to add the optional date pieces or golden raisins.
Younger's Thoughts: It is very moist and the spelt flour adds a distinct taste that makes it better then it would be with regular wheat flour. The coconut sugar boosts it even more, even though there is only 1/4 cup of it! Overall, it is very delicious but I would recommend doubling the banana because the banana is overpowered by the flour. Spelt Banana Bread - Run Fast Eat Slow 1 1/2 cups spelt flour - I had to buy online 1 teaspoon ground cinnamon 1 teaspoon baking soda 1/2 teaspoon fine sea salt 1 stick (1/2 cup) unsalted butter, at room temperature 1/4 cup coconut sugar or other granulated sugar 2 eggs 1 1/2 cups mashed banana (3 or 4 VERY ripe, brown speckled bananas) 1 teaspoon vanilla extract 1/2 cup chopped toasted walnuts (optional) 1/2 cup date pieces or golden raisins (optional) Preheat oven to 350 º. Grease an 8 1/2 x 4 1/2-inch loaf pan. In a large mixing bowl, combine flour, cinnamon, baking soda and salt. In a separate bowl, beat together the butter and sugar on low until combined. Add the eggs, beat one minute. Add the bananas and vanilla and mix until combined, Pour the wet ingredients over the dry ingredients and stir until combined. Fold in walnuts and dried fruit if using. Pour into loaf pan and bake, 50-60 minutes, until top is golden brown. Cool on a wire rack for 15 minutes. Remove loaf from pan and cool completely prior to slicing.
I decided to start this blog because I wanted to chronicle the cooking I do with my boys, Older and Younger. Older is 12 years old, and Younger is 10.I enjoy cooking and even more so when I have one of my boys helping me out. This past summer, they started learning how to cook. They took turns cooking the family dinner, once, every other week. For the most part, it was very successful. Their confidence in the kitchen sky rocketed. I noticed some recipes needed more explaining then what the cook books provided, so here we are!